Differential Drive Robots - differential drive robot kinematics


In order to design behaviors or
controllers for, for robots, we inevitably
need models of how the robots actually
behave. And we're going to start with one
of the most common models out there, which
is the model of a differential drive
mobile robot. So, differential drive
wheeled mobile robot has two wheels and
the wheels can turn at different rates and
by turning the, the wheels at different
rates, you can make the robot move around.
So, this is the robot we are going to
start with and the reason for it is
because it is extremely common. In fact,
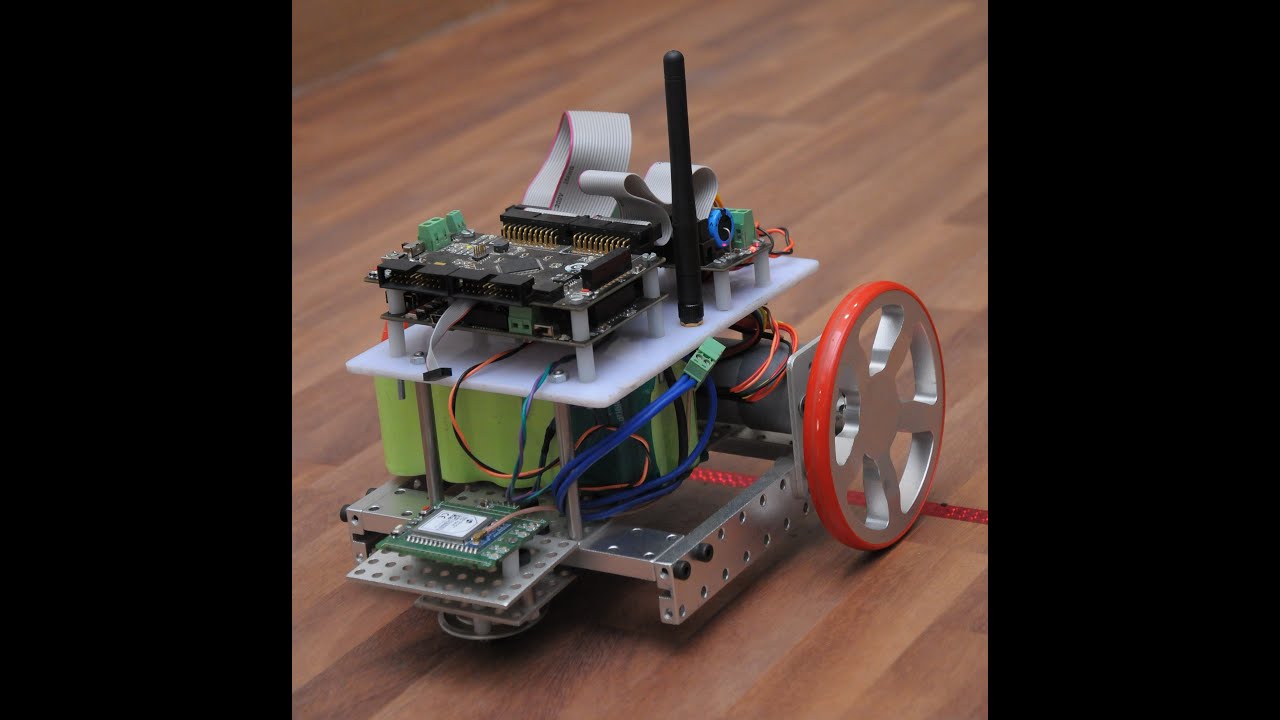
the Khepera 3, which is the robot that we
are going to be using quiet a lot in this
course is a differential drive wheeled
mobile robot. But a lot of them out there
are, in fact, differential drive robots.
Typically, they have the two wheels and
then a caster wheel in the back. and the
way these robots work is you have the
right wheel velocity that you can control
and the left wheel with velocity that you
can't control. So, for instance, if
they're turning at the same rate, the
robot is moving straight ahead. If one
wheel is turning slower than another, then
you're going to be turning towards the
direction in which the slower wheel is.
So, this a way of actually being able to,
to make the robot more round. So, let's
start with this kind of robot and see what
does a robot model actually look like.
Well, here's my cartoon of the robot. The
circle is the robot and the black
rectangles are supposed to be the wheels.
The first thing we need to know is what
are the dimensions of the robot. And I
know I've said that a good controller
shouldn't have to know exactly what
particular parameters are because
typically dont know what the friction
coeficcient is. Well, in this case, you
are going to need to know two parameters.
And one parameter you need to know is the
wheel base, meaning how far away are the
wheels from each other? We're going to
call that L. So, L is the wheel base of
the robot. You're also going to need to
know the radius of the wheel, m eaning how
big are the wheels? We call that capital
R. Now, luckily for us, these are
parameters that are inherently easy to
measure. You take out the ruler and you
measure it on your robot. But these
parameters will actually play a little bit
of a role when we're trying to, to design
controllers for these robots. Now, that's
the cartoon of the robot. What is it about
the robot that we want to be able to
control? Well, we want to be able to
control how the robot is moving. But, at
the end of the day, the control signals
that we have at our disposal are v sub r,
which is the rate at which the right wheel
is turning. And v sub l, which is the rate
at which the left wheel is turning. And
these are the two inputs to our system.
So, these are the inputs, now, what are
the states? Well, here's the robot. Now,
I've drawn it as a triangle because I want
to stress the fact that the things that we
care about, typically, for a robot is,
where is it, x and y. It's the position.
And which direction is it heading in? So,
phi is going to be the heading or the
orientation of the robot. So, the things
that we care about are where is the robot,
and in which direction is it going? So,
the robot model needs to connect the
inputs, which is v sub l and v sub r, to
the states, somehow. So, we need some way
of doing this transition. Well, this is
not a course on kinematics. So, instead of
me spending 20 minutes deriving this,
voila, here it is. This is the
differential drive robot model. It tells
me how vr and vl translates into x dot,
which is, how does the x position of the
robot change? Or to y dot, which is how is
the y position, or phi dot, meaning how is
the robot turning? So, this is a model
that gives us what we need in terms of
mapping control inputs onto states. The
problem is, that it's very cumbersome and
unnatural to think in terms of rates of
various wheels. If I asked you, how should
I drive to get to the door, you probably
not going to tell me how what v sub l and
v sub r are, your probably g oing to tell
me don't drive too fast and turn in this
direction. Meaning, you're giving me
instructions that are not given in terms
of v sub l and v sub r, which is why this
model is not that commonly used when
you're designing controllers. However,
when you implement them, this is the model
you're going to have to use. So, instead
of using the differential drive model
directly, we're going to move to something
called the unicycle model. And the
unicycle model overcomes this issue of
dealing with unnatural or unintuitive
terms, like wheel velocities. Instead,
what it's doing is it's saying, you know
what, I care about position. I care about
heading, why don't I just control those
directly? In the sense that, let's talk
about the speed of the robot. How fast is
it moving? And how quickly is it turning,
meaning the angular velocity? So,
translational velocity, speed, and angular
velocity is how quickly is the robot
turnings. If I have that my inputs are
going to be v, which is speed, and omega,
which is angular velocity. So, these are
the two inputs. They're very natural in
the sense that we can actually feel what
they're doing which, we typically can't
when we have vr and vl. So, if we have
that, how do we map them on to the actual
robot. Well, the unicycle dynamics looks
as follows, x dot is v cosine phi. The
reason this is right is, if you put phi
equal to 0, then cosine phi is 1. In this
case, x dot is equal to v, which means
that your moving in a straight line, in
the x-direction, which makes sense.
Similarly for y, so y dot is v sine phi
and phi dot is omega because I'm
controlling the heading directly or the,
the, the, the rate at which the heading is
changing directly. So, this model is
highly useful, we're going to be using it
quite a lot which is why it deserves one
of the patented sweethearts. Okay, there
is a little bit of problem though because
this is the model we're going to design
our controllers for, the unicycle model.
Now, this model is not the differential
drive wheele d model, this is. So, we're
going to have to implement it on this
model and now, here we have v and omega.
These are our, the, the control inputs
we're going to design for. But here, v sub
r and v sub l are the actual control
parameters that we have. So, we somehow
need to map them together. Well, the trick
to doing that is to find out that this x
dot, that's the same as this x dot, right?
They're the same thing. This y dot is the
same as the other y dot. So, if we just
identify the two x dots together, then
divide it by cosine 5, we actually get
that the velocity v is simply r over 2, v
sub r plus v sub l or 2v over r is vr plus
vl. So, this is an equation that connects
v, which is the translational velocity or
the speed, to these real velocities. And
we do the same thing for omega. We get
this equation. So, only l over r is vr
minus vl. Now, these are just two linear
equations, we can actually solve these
explicitly for v sub r and v sub l and if
we do that, we get that v sub r is this
thing and v sub l is this other thing. But
the point now is, this is what I designed
for, this is what I designed for. So, v
and omega are design parameters. l and r
are my known measured parameters for the
robot, the base of the robot, meaning how
far the wheels are apart, and the radius
of the wheel. And with these parameters,
you can map your designed inputs, v and
omega, onto the actual inputs that are
indeed running on the robot. So, this is
step 1, meaning we have a model. Now, step
2 is, okay, how do we know anything about
the world around us?
 Driving Robots Around - telepresence robot rental

Driving Robots Around - telepresence robot rental


How do I drive a robot from
point A to point B, or in this case from a
blue ball to a yellow sun? And the first
question we need to understand before we
can even answer how to drive it is what do
we need? Well obviously, we need to
measure where the sun is or the goal point
is, and somehow turn this into the control
actions. So, we've taken the information
from the sun and we're feeding it into the
controller. So, one of the things we need
is to design the controller which we kind
of know a little bit about already. We
also need to understand what information
the robot actually has. So, we're going to
have to discuss a little bit about how do
robots actually gain information about the
world. And, of course, for that, we need
sensors. So, we need to discuss sensor
models at the sufficient level of
abstraction so that we can reason about
them, but they need to be rich enough so
that we can trust that the information
that our controller is based on, is
actually something that the robot has. And
then finally, in order for the controllers
to be useful, we need to be able to
basically predict how they're going to
influence the robot. So, we're going to
need models. So, what I'm going to do in
this module is to discuss robot models
and, in particular, we're going to look at
differential drive robot mobile robots and
we're going to discuss sensors. And we're
going to look at sensors that allow us to
gain information about the world around us
and sensors that allow us to know
something about our internal state. For
instance, where is the robot? what we will
not do is any advanced perception. We're
just going to look at the abstracted
sensor models that give us the type of, of
infor mation that we want. But before we
even do that, whenever you try to design
controllers for robots that drive around
in the world, there are two facts that you
really have to embrace. And the first is
that the world is fundamentally unknown.
You're not going to know where every chair
in the building is. You're not going to
know where every tree in the forest is
when you're out driving in the forest. So,
there's no way you can plan in advance
exactly what the robot should be doing.
The second is, people move chairs. People
move around. The wind makes trees blow ,
or sway.
So, the world is actually changing and
dynamic. And for that reason, it's also a
bad idea to try to produce, in advance, a
very complicated monolithic controller for
doing everything. So instead, what we do
in robotics, a lot of times, is we divide
the control task into chunks and then
we'll design controllers for those
individual chunks. So, for instance, if
I'm a robot trying to get to a goal, I may
have some kind of controller that's taking
me to the goal and then when something
shows up in the environment, I switch to
another controller that allows me to avoid
that thing in the environment. And, in
fact these primitive building blocks that
from our point of view are different
controllers, in robotics, they're called
behaviors. So, behaviors are going to be
key concepts in this course and we're
going to design quite a few of them. And I
just want to mention a handful of very
standard behaviors that we will indeed
see. Go-to-goal is the most basic one,
which means drive to a, a waypoint or
target location. Avoid-obstacles is
absolutely crucial meaning, don't slam
into things on the way over there. Then if
you're in, you know, an office
environment, you know that the world is
typically straight lines, walls, so
follow-wall is not a bad type of behavior
to have. If the goal is moving, you may
want to track it instead of going to just
static goal, and so forth, and so forth.
We'll see quite a few of these different
beha viors.
And I would like to start with a video
here of a robot that I was developing or
working on, that used camera information
to build up a map of what the world looked
like and here is what the robot is doing
when it's based on a planner. Here's, it's
seeing something and it's kind of putting
it in the map and then it's thinking up a
new long plan to, for the robot to take.
So basically, you saw the robot spending
a, a large amount of time dealing with new
information because it had to re-plan. So
now, we're running to exact same thing
with behaviors. So, we're following a plan
or just, in fact, follow plan behavior and
then when something pops up, we're
switching to an avoid-obstacle behavior.
So now, the same things which is up in
the, or shows up to the robot. Instead of
the robot sitting around thinking for a
long time, it just avoids it. And once
it's clear, it goes back to following the,
the, the plan. So, this would be an
example of why behaviors are really
useful. Here is another example. This is
actually a segway robot, so the dynamics
is very complicated. And never mind the,
the moving graphs in the lower, lower part
of the picture. What I want you to see is
that this robot is actually, in this case,
switching between different arc behaviors.
So, there are different arcs that the
robot can take and the behaviors, in this
case, are follow various arcs. So now, you
can put behaviors that are not as simple
as just go-to-goal and instead, the
behaviors would be arcs of various sizes
and shapes. And we will become quite good
at understanding how to design these
individual behaviors, and as well, how to
combine them.
 Implementation | Control of Mobile Robots

Implementation | Control of Mobile Robots


Now we have a rather useful seemingly
general purpose controller, that we call
the PID regulator. And, we saw that we
could use it to design a cruise controller
for a car to make the car reach the, the
desired velocity. what I haven't said
though is how do we actually take
something that looks, Looks, to be
completely honest, rather awkward. You
know? Integrals and derivatives and stuff.
And actually turn it into executable code.
Meaning, how do we go from this
mathematical expression to something
that's running on a platform? Well, the
first thing to note is that, we always
have a sample time. We're sampling at a
certain rate. There's a certain clock
frequency on the, on the computer. Well,
what we need to do is we need to take
these continuous time objects that we have
here in the, in the PAD regulator and have
them be defined in this discreet time.
First of all here is an arrow, it doesn't
matter if this is running in continuous
time and discrete time, the proportional
part we just read in the current's
velocity. And compare it to the reference
velocity, and then we get the error at
time, k times delta t. So that's trivial.
Now, but what do we do with derivatives
and integrals? Well, let's start with the
derivatives, because they are not so hard.
we know that, roughly, a derivative is the
new value. Minus the old value divided
delta t. In fact, as delta t goes to 0,
this becomes the definition of a
derivative limit. So, we actually know
that if I can store my old error, compute
a new error, take the difference and
divide it by delta t, I have a pretty good
approximation of edot, which is this thing
de(t)/dt, so I actually can approximate
the, the derivative part in a rather
direct way. Compared the latest value to
the previous value divided by delta two,
and we're good. Now the integral. That's
where we're going to have to do a little
bit of work. So, what is the integral?
Well the integral is The sum under the
curve right. That's the integral. Well is
there some way of approximating this?
Well, clearly it is. We can sum up all
these little blocks. This is a rim
approximation of the integral. So what
this means is well we're not going to get
the integral exactly, but if you can sum
up these blocks somehow and the width here
is going to be. what did we call it? Delta
t. So the width of each base of the
rectangle is delta t. So if you can do
that. Then we're getting a, a reasonably
good approximation. And, in fact, then the
integral is simply a sum of the values at
the sample time. So the value up there.
The value at that time. And then we
multiply it by delta T to get the
rectangle, and then we sum up all the
rectangles. That's a reasonable
approximation and in fact what I'm going
to do is I'm going to take this sum and
call the sum E. So this is the same thing.
So then the integral is roughly equal to
delta T times E. Well, that turns out to
be useful because, let's get rid of that
stuff again. my next value, delta, or E
delta t times e new. Well, it's delta t
times the sum, but now I'm summing to n
plus 1, well, let's pull out the last
term. So, the error At time, n plus 1
times delta t. That's the last value that
we called little e new up here. Let's pull
that out, multiply it by delta t, and
what's left is the sum from 1 or 0 to n,
which is E old, times delta t. So, delta
t. E new is equal to delta t, E old + this
guy here. Or if I want to put it in a
slightly more compact way, E new where E
is the sum of the errors is E old + the
latest error. Which is a little bit dah.
The new sum is the old sum plus the latest
entry. So, that gives me Enew and now,
since I kne know that the integral is
delta t x E, I know that, well, the
integral term that I get here is simply
delta t times Enew which gives me an
approximation of. The interval.
So, now, having said it, let's put this
into, into pseudo-code here. So, every
time the controller is called, well, I'm
going to read in the latest error, which
is the reference minus the measurement.
And then, I'm going to say e _dot.
E_dot is really.
E minus, now we call it, let's call it e
old, here. It's really divided by delta t,
right? But the D part of the controller is
Kd times this thing. Well, what if I just
called this thing my new, let's call it kD
prime. I just divided by delta t because I
don't actually need to typically know
delta t. Let's call this kD prime. Well,
then I just got rid of delta t, and I
don't have to worry about. Delta t. I do
the same thing for the integral. So e new
is e old plus the latest error. Again, I
really have that this thing, this
integral, is roughly equal to delta t.
Times E. So if I have kI times that, I
have this times kI, well let's take these
guys and call this, this is my new kI.
Then again I get rid of the T, so then if
I do that, my actual controller is KP
times E times KP times E dot. Which I just
computed and KI times E. This is my
control structure, this is how we actually
implement it. And then I just need to at
the end, remember to store the light, the
latest E as the old E so the next time I
call the controller, I have the previous
value. This is the implementation of a.
PID regulator.
So let's do it. OK.
I'm going to point out again. The
coefficients include the sample times. I
pointed that out already. But let's do it.
Before we do it though I actually want to
say that that's the end. Almost of Module
1. And in Module 2, we're going to go
robotics. In the sense that we're going to
see, now, how to relate some of these
initial concepts to robotics. But, in the
interest of full disclosure, we actually
don't know why anything we did in Module.
1 actually worked.
So Module 3 is we're going to revisit what
we did here. But, revisit it in a much
more systematic way. Okay, that's enough
chitchat. Now, let's do it. We're going to
do altitude control. Which means we're
going to control the height, how high up
in the air a Quadrotor is. And the model
we're going to use is, well, x is going to
be, so here's the height, here's the
ground, so x is going to be how high up
this thing is. And x.., which is the
acceleration of the quadrotor, well g, the
gravity, is pulling it down, so there has
to be a -g somewhere. gravity is pulling
it down, and then what we're doing is
we're really controlling the velocity of
the rotor collectives. So these are all
the rotors of the quadrotor, all the four
rotors, the angular velocity of this thing
we're controlling. And that's translating
into thrust and upthrust through This
coefficient, c, that we don't know. And we
actually really don't know what the
gravitational constant is either, but this
is the model we're going to use. And this
is the controller we're going to use. And
instead of me showing plots and
simulations, why don't we get away from
the Power Point presentation right here,
and move over to an actual quadrotor
running a PID. Regulator.
So, now that we have a way of designing
reasonably good controllers. In this case,
PID regulators. we have some understanding
of the basic performance objectives we're
trying to hit. In this case, stability,
tracking, and robustness. We even have a
model, or at least a rudimentary model of
a. Quadrotor aerial vehicle. What we did
in the model is we tried to somehow
connect the rotor collective speed to an
up-thrust and the model included some
parameters that we don't know. It even
included the gravitational constant. The
idea, of course, with robustness now is,
we should not have to know these
parameters. Exactly.
Because that would actually be a rather
poor and fragile control assign. So I have
JP Delacroix with me here who is a
graduate student at Georgia Tech. And
without any further ado, JP, let's see
what thee PID regulator actually looks
like in action. , So what we're doing now
is altitude control only. So we're trying
to make this thing stay at the fixed
altitude. It's going to drift a little bit
sideways because we're not controlling
sideways drift at all. one thing we can
see right off the bat is that the system
is indeed stabilized. Because if it
wasn't, the quadrotor would actually fall
down to the ground. The other thing we see
is, when I'm pushing it a little bit like
this, it's able to overcome it. I can even
push it down a little bit. And the
controller fights these disturbance, so
robustness is, certainly achieved. In
terms of tracking, it's not so clear
what's actually going on because we don't
exactly see what the reference height is,
however we are measuring altitude with a
downward facing ultrasonic sensor and,
let's get this thing out of the way of JP.
And the integral part or the integral term
in the PID regulator is ensuring that
modulatiries these extra errors in the
height measurements, we are actually
achieving the. The altitude we were,
looking for. So with this rather simple
initial experiment, we're going to declare
success when it comes to PID regulation.
And we now are going to move on to bigger
and better problems. Thank you. ,, .

understanding pid control - pid controller explanation


So, last time we saw that the PI
regulator, or its slightly more elaborate
brother, the PID regulator, was enough to
make the cruise controller do what it
should do. Which is, achieve stability,
tracking and parameter robustness. Today I
want to talk a little bit more about PID
control.
And, the reason for that is, this
regulator is such an important regulator
or controller that's out there in
virtually every industry you can think of,
there is a PID regulator going on
underneath the hood in almost all
controllers. And, there are really three
knobs you can tweak here. One is KP, which
is the proportional gain. The other's kI
which is the integral gain and then kD
which is the derivative gain. And I want
to talk a little bit about what are the
effects of these gains? Well first of all
P As we saw. It's a contributor to
stability. In the sense that, it makes the
system, not guaranteed. But it's helping
out to make the system stable. And it's,
it's making it responsive in the sense
that. You respond if someone, if you
click, or press 70 miles per hour on your
cruise controller. It drives the system
towards that value. I'm calling it medium
rate responsiveness. Because it's not
super fast. And the speed. In fact, the
rate of responsiveness is a function of
how big kp is. But as you saw, it wasn't
typically enough to achieve tracking. But
the I component is really. Good for
tracking and in fact if your system is
stable than having an eye component is
enough to assure tracking in almost all
cases. It's also extremely effective at
rejecting disturbances so that integral
part is a very effective Part to have in
your controller. Now it's much slower in
the sense that you have to accumulate over
time errors to respond to them because
it's an integral. So it, it re, responds
slower and there is a very there is a
little bit of a warning I need to make
there, by making k i large. You may very
well induce oscillation so this is not, oh
I'm going to pick all of the Them.
A million and go home. Yo u have to be a
little careful in how you actually select,
select these gates. Now the d part, well,
since it's not responding to actual
values, their values but the change is in
their values, it's typically faster
responsiveness, so something is about to
happen. Well, the rate is changing so the,
the derivative part kicks in typically
faster. now there is a little caveat to
this. And that's the derivative is
sensitive to noise. Because if you have a
signal that's noisy then if you compute
the derivative of that signal you're going
to get rather aggressive derivatives that
don't necessarily correspond to what the
non noisy signal would be. So you have to
be a little careful with the d part. So
making KD too large is typically an
invitation to disaster because you're,
you're over reacting to, to noise. So, the
last thing I want to point out though is
when you put this together you get PID
which is already by far the most used low
level controller. Low level means whenever
you have a DC motor somewhere and you want
to make it do something Somewhere there is
a PID leak. Whenever you have a chemical
processing plant for getting the right
concentrations in your chemicals,
somewhere there is a PID regulator. It's
almost everywhere there, or in almost all
control applications, PID shows up under
the hood in some form or another. But, I
do want to point out, that this is not a
one-size-fits all. We can't guarantee
stability with a PID regulator. Sometimes
it's not enough. In fact, when we go to
complicated Robotic systems, the PID
regulator will typically not be enough by
itself. So we need to do a lot of more
thinking and modeling to, to use it and at
this point we actually don't really know
how to pick these gains. However, I want
to point out that this is a very, very
useful type of controller. And since it is
a feedback lob because it depends upon the
error it actually fights uncertainty model
parameters in a remarkable way and the
feedback has this remarkable ability to
overcome the fact that we don't know
gamma, we don't know c, we don't know m.
But still, we seem to do well when we
design controllers for a wide range of, of
these parameters. So having said that,
let's hook it up to our car and in fact we
had a PID regulator for velocity control
on the urban challenge vehicle, Sting 1 as
it's called. We had this model that we've
already seen, and I pick It's completely
random and arbitrary numbers here for the
parameters. I even put r equals to 1, so
we're going to go 1 mile per hour. let's
say 1 meter per second. it really doesn't
matter These are arbitrary values. Just so
you'll see what's going on. So, if we
start with our friend The p regulator so
we have kp = 1 here and all the other
gains are 0 then well, we don't actually
make it up to 1 we only make it 2 - 0.1.
This we had already seen. So the p part by
itself was not enough to, to both be
stable and achieve tracking. Well, that's
Ok in the i part. It's cruise-controller
again kp is 1, kI is 1 and now we are
having a very nice so called step response
which means we are responding, we are
waking up and then we are hitting it with
a step, in this case the step of height 1
or 70 if its 70 miles per hour. so then
this thing makes it's way up and it stays
up there perfect. So this is actually a
good and successful design right here. Now
,if this is so good why don't we make ki
higher to make it even better? Well if I
To crank up KI to 10. Then, all of a
sudden, my system starts oscillating. So
this is an example of where the integral
part may actually cause oscillations.
Which is, we should at least be aware of
this fact. And be a little careful when we
tweak our parameters. And if we see
oscillations That is a. Clear indication
that the integral part is typically a
little bit too large. What about the d
part? Well, let's add the d part. In this
case, it actually doesn't matter too much.
What you see here is that I had a small d
part. I'm a little bit paranoid when it
comes to large kd terms because they are a
little bit Noise sensitive.
But what you're seeing here is that you're
getting a faster initial response because
of the introduction of a D part, but then,
we actually get almost a slower response
towards the end so the D part is there to
drive it well up in the beginning, but
then So were stand in this particular
application, having a d gain that's not
ser, it's not even clear if that was, was
useful. But this is some of the thinking
that goes into tweeking PID regulators.
So what we are going to do next time, is
we're going to go now, from this rather
abstract, integrals and derivatives, to
something that we can actually implement.
And we're going to see how these PID gains
show up when we control a the altitude of
a hovering quad regulator..

Performance Objectives - individual performance objectives examples


So recall, last time, we saw that. We
designed a controller that was nice and
smooth. It didn't overreact to small
errors. made a system stable. Yet didn't
achieve tracking. And this was the
proportional regulator, or the p
regulator. and let's return to our
performance objectives a little bit. We've
talked about them briefly. But a
controller at the minimum should.
Stabilize the system. If it doesn't do
that, we know nothing and I've written
this rather awkward looking acronym here,
BIBO, which is something out of the Lord
of the Rings almost. What it stands for
is, bounded in, bounded out which means
that if the control signal is bounded, the
state of the system should also be
bounded. What this means is that, by
doing. Reasonable things the system
doesn't blow up. And our system doesn't do
that. Tracking means we should get to the
reference value we want. And robustness
means we shouldn't have to know too much
about parameters that we really have no
way of knowing. And preferably we should
be able to fight noise as. Well, so recall
at this was the model and when I
introduced this wind resistant term here,
we had a little bit of a problem.The
proportional regulator couldn't overcome
it and lets have another controller done
one that explicitly cancels out the effect
of the wind resistance. So here is my.
Attempt 3, I'm going to use this part,
which is the proportional part that we
already talked about, and then I'm going
to add this thing which is plus gamma
m/c*x.
Well why did I do this? Well, I did this
for the following reason that if you reach
steady state x is not equal to 0, then now
What you get is well this was the p part.
This is the controller, the p controller.
And then the effect of this thing well
you're going to multiply this by c/m. What
you're going get then is plus gamma x. And
then you have wind resistance which is
negative gamma x. So the gamma x, the bad
parts cancel out. And in fact all we're
left with then is that x. Has to be equal
to r. So, voila, we've sol ved the
problem.
We have perfect tracking. Or, have we?
dom, dom, dom. No, we have not. And, why
is this? Well, we have stability and we
have tracking, but we don't have
robustness. Here are three things that we
don't know. Gamma, m, and c. And our
controller depends explicitly on, On these
coefficients. So all of a sudden we have
to know all these physical parameters that
we don't know, so this is not a robust
control design. So Attempt 3 is a failure.
Okay, let's go back to the P-Regulator and
see what's going on there. What, what's
actually happening is that the
proportional error is doing a fine job
pushing the system up to close to where it
should be, but, then it kind of runs out
of steam, and it can't push hard enough to
overcome The effect of the wind
resistance. So the proportional thing
isn't hard enough, but take a look here.
This is the error, then the error starts
accumulating over time, so if we somehow,
if we're able to collect All of these
errors over time, even though they are
very small. Over time, that should be
enough, so that we can use this now
accumulated error to push all the way up.
So I wish there was some way of collecting
things over time in a plot like this. And,
of course, there. There is, this is
something called an integral. So, if we
take the integral over the error we're
collecting the error over time and over
time as this errors going to accumulate
it's going to give us enough pushing power
to actually overcome the wind resistance.
So attempt 4 is a pi. Regulator.
So what I have here is the error at time
t. This is my kp, which is my proportional
gain. So this is the p part that we
already saw. And now, I'm adding an
integral that is integrating up the error
from. The beginning to the current time.
And it's collecting this. And then we have
another term here, or another coefficient.
The ki, where I stands for the integral
part. So this a pi regulator. And it is
2/3 of. The most common regulator found
anywhere in the world, and in fact it's
almos t 2/3 of commercial grade cruise
controllers. So if I have a p and an i,
what could possibly be missing to get to
all of them? 3/3 instead of just 2/3.
Well, we take a derivative. Right, we have
proportion, we have integral, and we have
a derivative. So, why not produce what's
called a PID-Regulator? So now we have a
proportional term with a proportional
gain. We have an integral part with an
integral gain. And then we have a
derivative part with a derivative gain, so
this is. It's an extremely useful
controller that shows up a lot. And, in
fact, I'm going to hand, have to hand out
a big sweetheart to the PID regulator.
Because it's such an important type of
control structure that shows up all the
time. And in fact we're going to get quite
good at designing the PID regulators. Now
having said that, I can draw hearts all I
want, let's see it in action and see what
it actually does. And if I use just the PI
regulator, not even a D component to the
cruise controller, then all of a sudden I
get something that's getting up quickly,
nice and slowly, I mean smoothly, to 70.
Miles per hour, which is my reference. So
this solves the problem. I don't know
parameters, so it's robust. I'm achieving
tracking, because I'm getting to 30 miles
per hour. And, I'm stable in the sense
that I didn't crash. So, this seems like a
very useful design.

Control Design Basics - industrial control panel design basics


Okay.
So, so far in the course, we have mainly
chit-chatted about things. We've seen some
models and we have now a model of a, a
cruise controller or at least how the
controller input affects the velocity of a
car. We see it here, x dot was c over m
times u. Where x was the velocity, u was
the applied input, and c was some unknown
parameter, and m was the mass of the
vehicle. We also talked a little bit about
what we wanted the controller to do. So
now, let's start designing controllers.
Let's actually do it. No more excuses.
What we want, of course, is that x should
approach r. And recall, again, that r was
the reference velocity that we wanted the
car to get to. And x is the actual
velocity. And typically, in control
design, you talk about asymptotic
properties, which is fancy speak for when
t goes to infinity. So, what we want, is,
after a while x should approach r. The
velocity should approach the reference
velocity. Or another way of saying that is
that the error, so the mismatch or
imbalance between the 2 two velocities
should approach 0. That's what we want.
So, I am going to give you a controller
here. This is attempt 1. I have picked
some values for, you know, how hard I want
to hit the gas pedal. And I'm going to say
that, if the error is positive, so
positive error means that the reference is
bigger than the state, which means that
we're driving slower than we should. Then,
let's hit the gas. And if the error is
negative, meaning that the velocity, the
actual velocity of the car is greater than
the reference velocity, which means we're
going too fast, let's brake. And if we're
perfect, let's do nothing. Fine.
So, take a second to stare at this and see
what you think. Is this going to work or
not? Okay, a second is up let's take a
look. Yeah, it works beautifully. I put
the reference velocity to 70 so it's up
here, here is 70. This is the actual
velocity of the car and look at what the
car is doing. It's basically starting down
somewhere and then increasing up to 70 and
then it's remaining flat around 70. So,
that's, that's awesome. It's doing what it
should be doing. Now, I'm calling this
bang-bang control and that's actually a
technical term from doing things like u
max and negative u max. You're switching
between two extremes. so this seems to be
easy peasy and there's no need to take a
course on controls and mobile robots. Now,
let's see what the control signals is
actually doing. Let's see what the control
values were that generated this nice and
pretty plot. Well, they look like this.
This ladies and gentlemen is miserable.
Even though the car was doing the right
thing in terms of the velocity, I had u
max be a 100, so negative max is minus a
100 and first of all, we are accelerating
up for a while, until we hit the right
velocity. And then, we start switching
wildly between plus and minus a 100. Well,
when the error was 0, the u was supposed
to be 0, but the error is never going to
be exactly 0. Just ain't going to happen,
and this is bad, because what's going on?
Well, first of all, we get a really bumpy
ride. We're going to be tossed around in
the car, backwards, forwards, backwards,
forwards, because of all these
accelerations that are being induced by
these, these extreme control signals.
We're also burning out the actuators.
We're asking the car to respond extremely
aggressive and for no good reason. I mean,
we're basically doing a lot of work when
we're very close to perfect. So, this is
actually not a particularly good control
design. And the problem is exactly this of
overreaction to small errors. Even though
the error is tiny, as long as it's
positive, we're slamming gas as hard as we
can. so we somehow need to change this
design. So, how shall we do that? Well,
the easiest thing to do is to say, you
know what, when error is small, let's have
the control signal be small. In fact,
here's my second attempt. u is k times e,
for some positive k, e is the error.
Positive error means we're going too slow,
u should be positive. Negati ve error
means we're going to fast, u should be
negative. So this is a much cleaner
design. It's what's called it's, it's a
smooth feedback law. It's actually linear
feedback in the error, and this seems to
be much more reasonable because small
error yields small control signals, which
is what we wanted. Nice and smooth. We're
not going to wildly fluctuate in our
controller. And, in fact, this is called a
P regulator, where P stands for
proportional because the control signal,
the input, u, is directly proportional to
the error through this k controlled gain.
So, here is a completely different and
possibly better way of doing it. This is
what the P-regulator in action looks like.
So, it's nice and smooth, right? It seems
even stable. Stable, again, we haven't
really defined it, but it's clearly we're
not blowing up the course. So, nice and
smooth and stable. Now, here is a little
problem. You see what it says up here? It
says 60 and I had my reference be 70. So,
even though we're nice and smooth, we
actually did not hit the target value. The
reference signal was supposed to be 70,
and we got to 58 or so. so even though
we're stable and smooth, we're not
achieving tracking. And here is the
problem. I actually added a term to the
model and this is a term that really
reflects wind resistance because here is
the acceleration of the car, this is our
term. Well, if we're going really, really
fast, we're going to encounter wind
resistance. So, add it a little bit of
wind resistance. This says that if we're
going positive and fast, then we're
getting a negative force, we, meaning,
we're being slow down a little bit and
gamma is some term or some coefficient
that again we don't know. And this was the
model I used when I simulated the
controller. and somehow, the P-regulator
wasn't strong enough to, to deal with
this, and in fact, let's see what happens.
At steady state, so steady state means
when nothing changes anymore, and if for
your call from the plot, after awhile, x
stopped varying. At steady state, x is not
varying. Well, another way of saying that,
is that the time derivative of x is 0. So,
at steady state, x is not varying, which
means that this term here has to be equal
to 0. And this is the model right? Well, I
know what u is. u is equal to k times
error, which is r minus x. So, I'm
plugging in u there. And I'm saying that
this thing has to be equal to 0. Well, if
I write down the corresponding equation
now that says that, this term here has to
be equal to 0, then I get this. Well, I
can do even better than that. What I get
is that x, let me get rid of the red stuff
there, x is now going to be, ck divided by
ck plus m gamma times r, and this, for all
these coefficients being positive, is
always strictly less than r. Which means,
that at steady state, the velocity is not
going to be, it's not going to make it up
to the reference velocity. And we can see
that if we make k really, really, really
big, then these two terms are going to
dominate and we're going to get closer and
closer to having this complicated thing,
go to r. So, as k becomes bigger, we're
getting closer to r, which means we're
having a stronger gain. But we're never,
for any finite value of the gain, going to
actually make it up to the reference. So,
something is lacking and next time, we're
going to see what it is that is lacking to
actually achieve tracking and stability.

how cruise control works - benefits of cruise control - Control of Mobile Robots


So now that we have a way of describing
dynamical systems with differential
equations in continuous time. Or
difference equations in, discrete time.
Let's, see if we can actually use this, to
do something interesting with, with
robots. And, let's start with. Building a
cruise controller for a, for a car. And
the, the cruise controller. I mean it's
job is to make the car drive at the
desired reference speed. And if you
recall, we're going to use r to describe
the reference. So someone You, in the car,
have set the reference speed to, to 65
miles per hour, or whatever you desire.
Now, we want to somehow understand how we
should model the car so that we can make
it go the reference speed. Well, like I
said last time, the laws of physics
ultimately will dictate how Objects in the
world, like robots or cars, behave. And
Newton's second law says that the force is
= to the mass * the acceleration. Now,
this is what we're going to have to start
with. There's nothing we can do about
this. It is what it is. Now, what is the
state of the system? because we need to
somehow relate Newton's Second Law to the
state. Well, in this case, since what
we're going to do is try to make the
velocity do the right thing, we can say
that, let's say that the velocity of this,
the car is the state. So x is going to be
The speed at which the carrist is driving.
Now acceleration a appear, this, a is
simply dv dt and its the time derivative
of the velocity or the change in velocity
as a function of time. So what we get from
that of course is that we can relate the
velocity to the acceleration. Now we're
also going to have to have an input, and
when you're driving a car, the input, if
you're dealing with, with speeds rather
than which direction the car is going is,
you press the gas pedal or the brake. And
we are going to be rather cruder and say,
you know what? Somehow we're mapping
stepping on the gas or the brake onto a
force that's applied To the car. And this
is done through some linear relationship,
where we h as some coefficient c, which is
an electric mechanical transmission
coefficient, and I'm going to go out on a
limb and say, we don't know what this is.
And, I control this sign cannot rely on us
knowing c, because we're not going to know
exactly what it is. But, let's at least
for now, go with this, and hope That
that's good enough to give us the design
we want. So now we know that the force is
c times u, but it's the mass time the
acceleration. Right.
So x dot, which is the same as dv, dt,
which we had up there. Well, that's A
which means that mass times the
acceleration which is mx dot is equal to
the force, but the force is c times u. So,
that tells me directly that x dot is c
over m times u. So, this, this sweet heart
equation here is an equation that
describes how my input maps on to. The
state of the system. It's a differential
equation. But it's an equation that tells
us something about how my choice of input
affects the system. Okay.
This is, in fact, a rather good model. And
I want to show a little video. I was
involved in one of the, the DARPA. grand
challenges.
This was an urban challenge. Where we were
supposed to build self-driving cars and we
use almost exactly this model for, for our
car. So I want to talk a little bit about
how one would do this. So here is the
front, a spinning thing, that's a laser
scanner. On the side here, is another
laser scanner sitting on top of a radar.
These were what we used to get
measurements. Now what we see on the
inside is our instrumented car, which
translated ultimately input voltages onto
mechanically things that push down the gas
pedal. So this is how we actually affected
it with the same coefficient. And now,
look at this video. The car gets around
obstacles, and then it gets out of bounds,
and it starts oscillating. So, I'm showing
this. A, because I think the car is
awesome. But, B, because there are, even
though we didn't crash into things, we
were oscillating a little bit. so there is
something not perfect about this control
design. See how we get out of the lane,
we're oscillating too much. If you look at
the steering wheel, see that this is a
little skittish. and that's another
indication that maybe the control design
here wasn't perfect, but the velocity
controller was based on a model that's
very similar to, to what we just wrote
down. here's another example of obstacle
avoidance where. We're actually trying to
avoid another car, but the point being is
that, this very, very, very simple model
that we wrote down is actually applicable
to real systems. And this is part of the
miracle of abstractions, that you're that
you're able to get simple things that you
then can apply for real. Now, I want to
point out that we did real well In this
competition up to a point, these were
actually the semifinals before the finals.
So let me show you what happened at the
end. This breaks my heart to show you but
I'm going to show it to you anyway. Here
comes our car. Sting racing.
It's slowing down, it's slowing down and
then ow. It drives straight into a k rail,
which is this concrete railing. What
happened was that we got some measurement
errors, a lot of measurement errors
actually from the GPS. But I wanted to
show you this because it was the outcome
of it. regardless of which, this was
still. A very complicated system. A very
complicated robot, a car, and the model we
came up with was very simple, and the
point is that simple models a lot of times
get you very far. So, let's see how we
should actually do, do the control design
here. let's assume that we can measure
directly the velocity, and record, recall
that the state. X is the velocity the
measurement or the output is what we
called y, so y is actually directly equal
to x in this case, so we have a some way
of measuring velocities which you know
typically have a, you have a speedometer
in your car so we know roughly what the
velocity is and now their control signals
should be a function of R-y, where r is
the desired velocity and y is the actual
velocity. And, I'm going to call this e,
which stands for error. And our job, as
control designers, is to make the error
disappear, drive the error down to zero.
So let's, before we do the actual design
discuss a little bit about what are The
properties that a useful controller could
have. Well 1 property is that the
controller should not overreact. If the
error is tiny, we're almost perfect in
terms of the velocity of the car, we
should not have a large control signal.
The control signal should not be
aggressive when we're close to being done,
it's like. Lets say that you're trying to
thread a, a thread through a needle. Well,
when you're really, really close you
shouldn't just jam the thread in there.
You should take it nice and slow when
you're close. So, no overreactions. That's
important, because when you start
overreacting, you start responding very
Quickly and aggressively to measurement of
noise, for instance. So, a small error
should give a small control input. U
should not be jerky. And jerky, here. All
I mean with that is that, it shouldn't
vary too rapidly all the time. Because if
it does, then we're going to be sitting in
this car. With our cruise controller,
we're going be having a cup of coffee with
us. And, now the cruise controller is
smacking us around all over, because it's
jerking, we're going to spill our coffee.
And, in fact for auto pilot's on
airplanes, there are limits on their
accep, acceptable accelerations That are
directly related to cups of coffees
standing on the, the tray tables in the
aircraft. so you should be, not
overreacting. It should not be jerky. And
the, it should not depend on us knowing c
and m. So, m is the mass of the car. C is
this semi-magical transmission
coefficient. The mass of the car is
changing depending on what luggage we
have. It's changing depending on how many
passengers we have. We should not have to
Redesign our controller just because a new
person entered the car. We shouldn't have
to weigh everyone and enter how much we
weigh to, for it to work. And in fact
elevators have bounds on how many people
can be in the elevators. This is import,
related to the fact that they design
controllers that are robust to Variations
in mass across a certain spectrum. Same
thing for cars. The cruise controller
should work no matter how many people are
in the car and we don't want to know c.
What this means is that controller can not
be allowed to depend exactly on the values
of c and m. So these are the 3 properties,
high level properties that we have to
insist on our control signal to have. So
having said that, in the next lecture
we're going to see how we can actually
take these high level objectives and turn
em into actual controllers and see what
constitutes a good control design and.
Conversely, it would constitute a bad
control design.

Kategori

Kategori